We have compiled a whole lot of information to answer some of the most common questions you may have about these very particular pieces of pastry.
Macaron or Macaroon?
What’s the difference? Well, the first thing you need to know about these little sweets is the correct pronunciation.
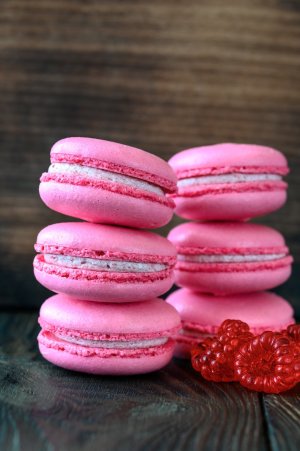
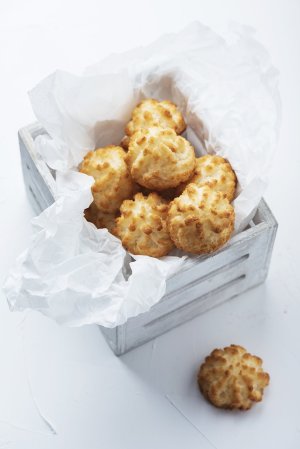
Macaron (pronounced mac-a-rohn) (pictured left) is the little almond based dessert that’s made up of two biscuits with a delicious filling in between, whereas a macaroon (pronounced mac-a-rune) (pictured right) is a completely different little cookie that your grandma would have made, composed of coconut and condensed milk.
Generally, there are three common methods to making macarons, the French, Italian and Swiss methods. These methods all have the same ingredients, but have slightly different techniques to make the meringue. They all achieve the same result.
The best way to understand which method works best for you is to give them all a go and see which one you prefer.
These methods all have a similar process, that follow certain steps.
Combine the almond meal (sometimes known as almond flour, depending on your location) and the icing sugar (powdered or confectioners’ sugar).
These are best combined in a food processor, using short, quick bursts so as not to release any extra oils from the almond meal, and then sifting together to remove any large pieces that would form lumps in the finished batter.
The French term that you may see in some recipes for this combination of ingredients is Tant Pour Tant.
Make the meringue. This part will vary depending on the method you have chosen.
This is a fancy-sounding term for the technique of combining the meringue and the almond and icing sugar mixture. There’s a specific way of folding the ingredients together to achieve the right consistency. This is also where people will most commonly go wrong in the macaron making process.
The basic steps on how to fold your ingredients together is by starting out folding in a ‘J’ shape. This means moving your spatula down the centre of the bowl, and then around the outside and repeating.
This should be done delicately at first and without squishing the batter until it is all combined so as not to knock any of the air out of your meringue.
Once all your batter is combined, you continue macaronaging until your batter flows nicely off your spatula in a ribbon. (The ribbon should look continuous and not break, but still fairly thick).
Test your batter by letting it fall off the spatula back into the bowl and count how long it takes for the fallen batter to settle back into the mixture. It should take about 10-15 seconds until its fully settled back in and you can’t see any lumps or peaks in the batter.
Check out this informative video below on how to tell when your macaron batter is ready:
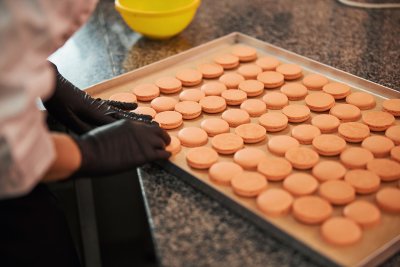
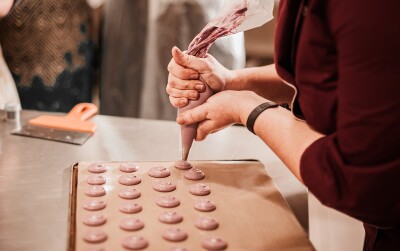
Once you’ve achieved the correct batter consistency, you’re ready to pipe your shells and bake them.
Pipe your shells an even size and nicely spaced apart, (the best way to achieve this is using a template that you can slip under your mat and remove before baking) allow them to rest and dry out in the air until a skin forms on the top. The amount of time this takes will vary on how humid it is where you are.
You’ll know they’re ready when you can see they’re not as shiny, and have gone more matte-looking and you can lightly touch the macaron. If it feels dry to the touch and no batter comes off on your finger they’re dry, and you’re ready to bake them!
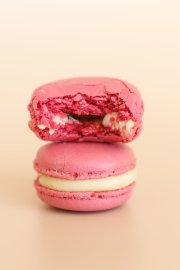
Macarons should be nice and smooth on the top, with a nice, ruffly look to the bottom (this part is called the feet).
Turning them over, they should be smooth and flat on the bottom, and not sticking at all to your tray.
When you break the macaron in half, it should have a crispy outer shell, and a fluffy, full interior that’s soft.
The general rule with macarons is that you don’t flavour the shells, except for chocolate shells having cocoa powder, but we recommend getting a handle on making basic ones first before attempting this.
The way macarons work is that the shells (the biscuit part) slowly absorb the flavour of the filling you choose over the maturation period. What we mean by maturation period, is making sure you fill your macarons approximately 24-48 hours before they’re intended to be eaten, so the shells have time to develop in flavour.
This also helps to ensure you get that nice, soft interior to your biscuit.
As mentioned above with chocolate macarons, it’s recommended that you don’t colour the shells until you get a handle on the technique and make sure you’ve got that down.
Once you’re confident in the method, you can start attempting to colour them.
The first thing you need to be aware of in colouring your macaron shells is which types of colours do and don’t work, and for what reasons.
These are generally a no. By adding a water-based colour into your macaron shells, you’re adding more liquid and not only increasing the drying time required, but also changing the consistency of your batter. They may be less likely to hold their shape and you’ll end up with flatter looking discs.
Examples of these types of colours are the bottles of liquid you can get at most supermarkets.
These ones work. Because they are a gel paste and not a liquid, they won’t change the consistency of the batter, however you do have to be careful not to use too much, as it can affect the drying of the macarons, and sometimes the flavour (depending on the colour).
Examples of these types of colours are brands like Americolor, Sprinks, Over the Top and Wilton
Definitely not. Oil-based colours are made for products where they can bind to fats, making them unsuitable for macarons. Instead of combining well, the oil actually starts to break down the meringue, and you end up with puddles of batter on your tray that will not dry, and therefore not rise to give you the nice ruffly feet.
The best option! Powder based colours are highly pigmented and have no liquid in them which means that you both don’t need to use too much, and it won’t change the consistency of your batter.
The Sugar Art Master Elite colours are water-activated, which means as you mix the colours through your meringue, you’ll see it come to life and colour exceptionally without changing the structure of your meringue at all.
Using a tray that is light coloured, flat or has very small walls is the best starting point. Darker trays retain more heat and trays with tall sides block the air flow of the oven and doesn’t allow for the feet to properly form.
The next thing you need is the proper material. A lot of people like to use silicone mats, but these can sometimes be detrimental as they are quite thick and can prevent the macarons from baking fully from the bottom, especially if the tray you are using is also thick.
Parchment or baking paper is also not recommended for the opposite reason, it’s quite thin which can result in over-baking or misshapen macarons due to it not being a sticky or flat enough material (it wrinkles and flies up easily).
The best mats that we’ve found for baking macarons are ones that are not too thick, not too thin and re-usable, while still being see-through enough that you can use a template for piping underneath.
The Loyal Bake & Line Mat is a Teflon material, great for its non stick properties, easily re-usable when cleaned and wiped with vinegar and it’s a great thickness. Some may call it the Goldilocks mat...
This one is completely personal preference! Once you’ve got an idea of how to make macarons and how your oven bakes them, you’ll find the best feet that you’re able to create.
While it’s true to an extent that smaller feet usually means fuller shells, this isn’t always the case. We think both look fantastic, and really, it’s the taste that matters the most!
Now that you know the basics of macarons, why not check out our blog on Macaron Troubleshooting?